When you’re a traveller or holidaymaker, there is nothing more exotic than witnessing native wildlife in its natural surroundings. You don’t have to be out on a deep African safari to appreciate all the species we share this planet with, and how special and fragile they are. There are animal photo opportunities everywhere. At some point you’re going to want to pull out your camera and grab those moments, and I think wildlife photography for beginners can be just as satisfying as it is for the pros.
I don’t mean selfies!
Sometimes you just want to take home a piece of an untouched, authentic encounter. A photograph that captures how you felt, not just the creature you saw. Maybe when you came across a rare, majestic white lion for the first time, or watched as a gazelle suddenly leapt and began bounding away through the grass towards the horizon.
I experienced exactly those moments in South Africa – and I’ve captured them, so I can share them with you.
This is not a technical guide at all – as a non-professional, I just wanted to share some of my ways of thinking that might help you make your photographs more appealing to your most important critic – yourself!
1. Know your lens and what story it can tell.
I’ve got a DSLR camera, and maybe you do too. If you don’t, that’s ok: most people with a DSLR only have one lens choice for their DSLR anyway, so the same rules apply:
Get to know your lens, so you already know what kind of framing you can achieve, and you can choose which shots you want to create and which you shouldn’t bother with, so you can just enjoy the moment.
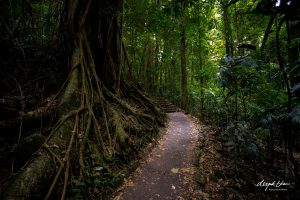
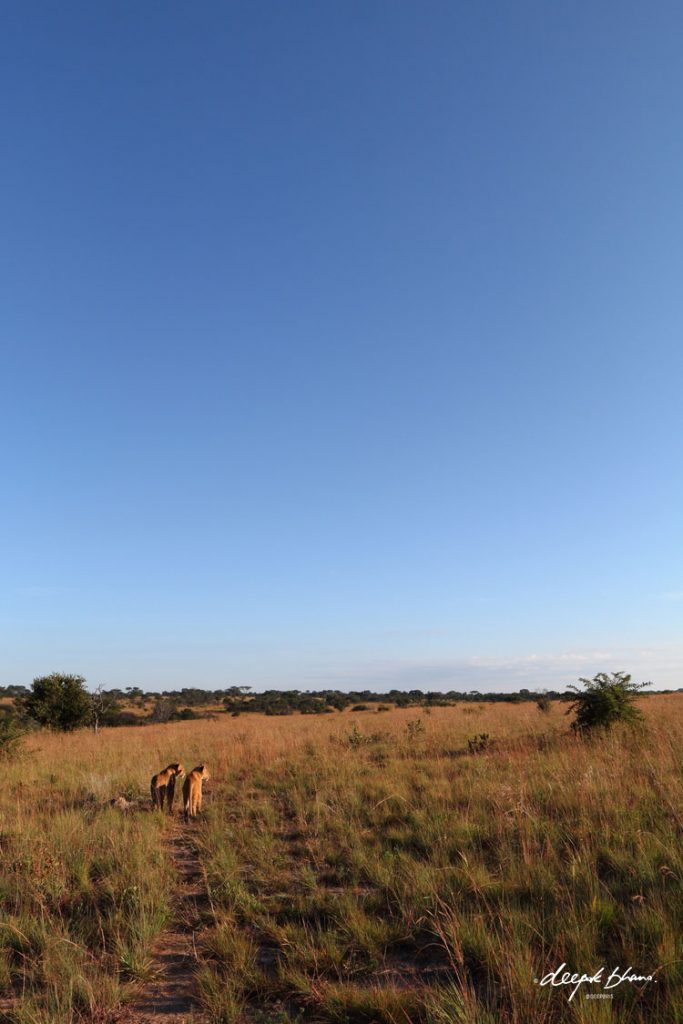
Wide or wide zoom lens? Anything in the wide range means you’re creating more open, expansive images of the surrounding environment with your animal subject relatively small in the frame. Great for telling a story about where your found the animal and how it fits into that place.
Mid-range or mid-range zoom lens? You might be able to fill your frame with your subject, but unless you’re pretty close to it to capture detail, it might be better to draw back and create that wider story.
Telephoto or telephoto zoom lens? If you have the power to zoom right in, you can create those close-ups of your subject and capture it’s eyes, the detail of it’s fur, or teeth… but remember if that’s all you can see, it means this animal subject could have been photographed anywhere – even in the zoo!
2. Tell a story with framing and composition
Framing and composition aren’t as mysterious as they’re sometimes made out to be. For a wildlife photography beginner, I think of framing as basically “put what you want to see in your picture, crop out what you don’t want to see” and then composition is “make what’s in your frame look balanced – no elements too big or small that your animal subject looks out of place in the scene.”
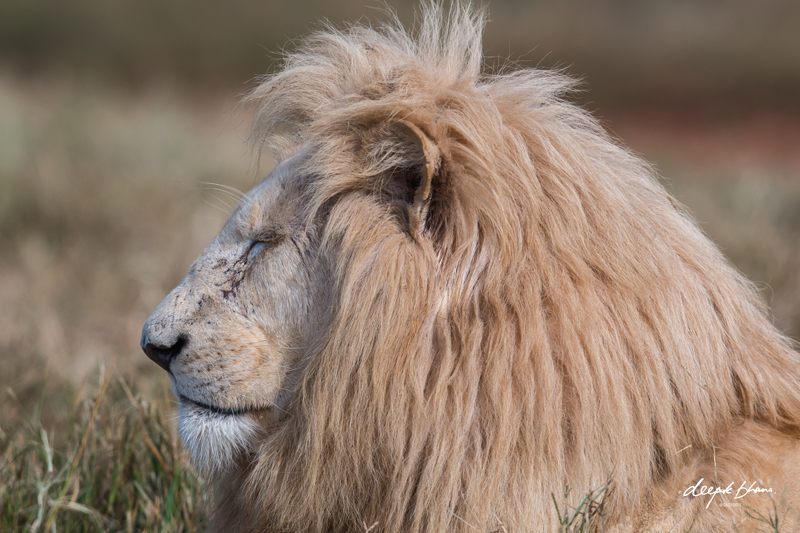
In this portrait of a while lion, for a moment I wished the sleeping lioness in the foreground wasn’t in the shot, but then I realised her presence actually added to the peacefulness of the scene. By including just hear ear in frame, the lion himself looks very content.
Looks like it’s good to be the king.

3. Avoid unwanted clutter
Professional photographers can use small f/stop settings (wide apertures) to optically blur the background and isolate their subject. In some of the photographs in this post, I have too – but if you don’t possess this option, then consider how you might bring your subject more strongly into the story and create more presence.
Look at the shape of the animal and think about keeping unwanted elements from interacting with that shape, for example watch out for tree branches, or other animals. Or worse still, people! Use your zoom or move your camera if you can, to adjust the frame or angle and let that key shape define your hero.
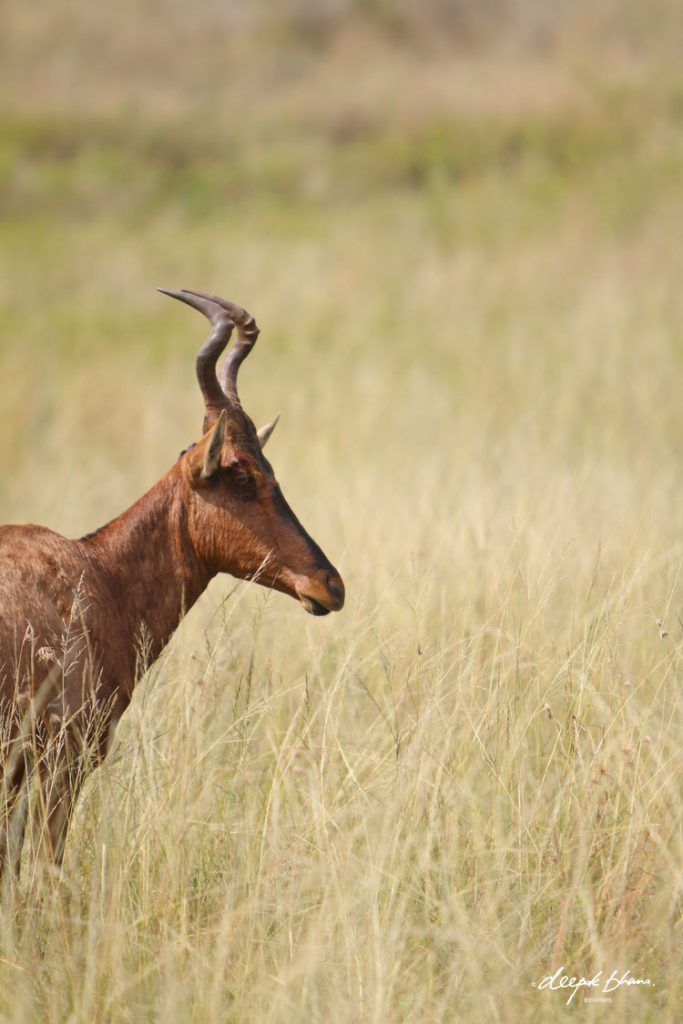
In this photo, we don’t need to see the whole hartebeest or the other antelope behind it; the surroundings to this side of it are so clean and the grasses in the foreground so light and feathery, the animal just appears balanced with its surroundings.
4. Anticipate what will happen next
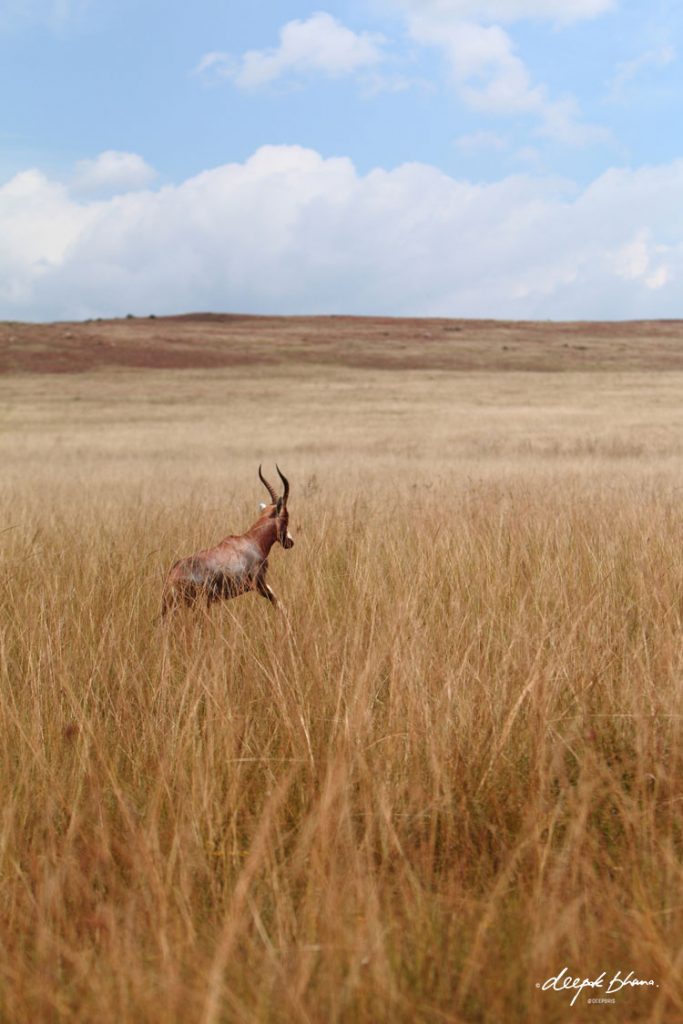
How did I know this gazelle would leap forward? No, I didn’t scare it to get the shot! And you shouldn’t either – there is no authenticity in trying to create false drama.
Instead, watch the animal, frame and focus your shot, and wait for movement. Keep an eye on the other animals around that move towards or away from it. Also watch people who might get too close. What ever the animal does naturally is your authentic, valuable moment.
5. Focus on the eye
If you can see an animal’s eye, then that has to be your focus point.
In wildlife photography, an artistic pro could make a beautiful image of an eagle with a wingtip in perfect focus, but the bird’s eye a little blurry.
As a beginner, you can’t do this!
If the eye is in frame, the success of your image depends on your viewer feeling connected to the animal, and the eye is what makes this connection. It doesn’t have to be the whole story of the image; but it will bring the story together. 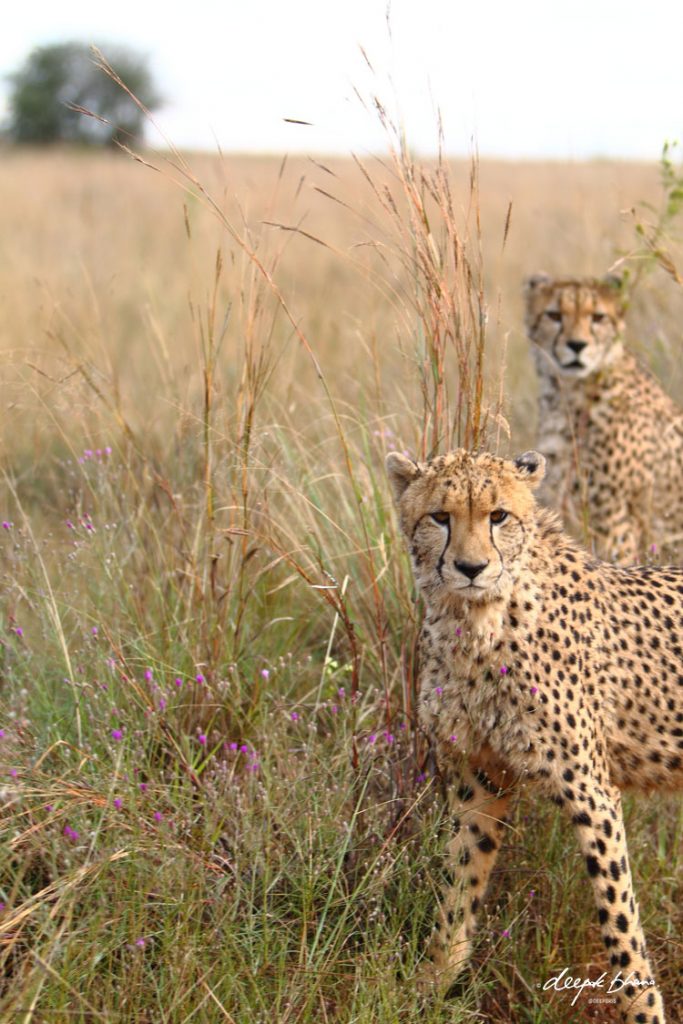
6. Freeze time
Ok, this one might get a little technical. If you have a camera which allows you to manually control your a shutter speed, you can freeze time. With animals (and active children!) this can mean a shutter speed of at least 1/640th of a second. (By contrast, a landscape can be shot hand-held at 1/80th of a second.)
If your subject is likely to move, and you want your image to have a crisp focus, test this out beforehand to see what you can achieve.
Remember, a faster shutter speed means less light, so your ISO (speed) and aperture (how much light you let in) will have to be adjusted to compensate.
If you can’t make these adjustments, consider zooming out or moving back to create a wider frame so the animal is not that large in the picture, and the success of the image does not rely on perfect crispness!
7. Focus on your own story.
You don’t travel to have the same exact experience as everyone else, do you? From atop table Mountain, you might love the view of Cape Town city – while your best friend can’t take their eyes off the beautiful ocean below.
Wildlife can hold the same interest – and while we all find a lion proud and regal, we each capture our own view of what makes him special and valuable.
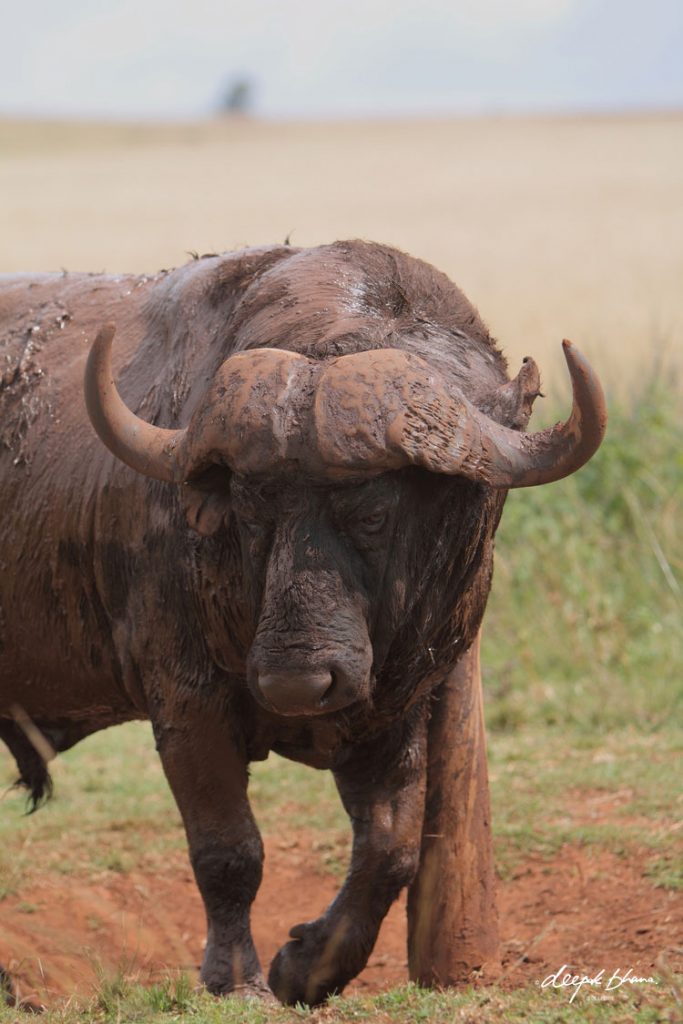
Look closely at wildlife before you start clicking away. Appreciate everything you can, including the surroundings and the way the light falls before you think of what your photograph wants to say.
Take this image for example: I could not take my eyes off the mud glistening on this buffalo in the hot sun while it rubbed against this scratching post, so I waited for it to lower its head (and sacrificing a shot of the eyes, mind you!) so I could capture the heavy shoulders and muddy back, which captured more of the raw power of the animal.
8. Appreciate where you are!
After all that’s why you’re here. Any location on your travels is an intrinsic part of the experience; and you won’t appreciate your photos if you spend every second clicking with the camera in your hands, and no time capturing the moment with the camera of your mind.
Your travel photography tells a story of your own exploration, your discovery, and your growth. The locations will be exotic, interesting and special. So take a break from recording memories, while you make the memories.
You alone can appreciate the moment for what it was, and even though you want to share your photography (we all do!) it’s also so valuable to let each photo tell your story – the one you feel and the one your remember.
Got any tips for other keen photographers? You can share yours in the comments below. Happy travels!
TRAVEL LOVE IS FOR EVERY DAY. LIKE TODAY!
This site is about being inspired by what’s real out there, on journeys that matter to you.
We’re a normal working family, not endless wayfarers or travel agents! We love exploring; in our daily daydreams, and on our trips.
Maybe you’re a ‘todayfarer’ too.
Buy WORLD PHOTO PRINTS – on archival quality paper